ORC Weeks 5 and 6: DIY Magnetic Chalkboard Wall!
Check out the other posts in this series!
Week One, Week Two, Week Three, Week Four, Weeks 5 & 6, Week 7, Week 8
Weeks 5 and 6 of the ORC saw the coffee shop office transformation progress with a new magnetic chalkboard wall, a pop of color, and some time-saving adjustments to the design plan! Let’s break it down.
A note on product links: I highly encourage you to shop at your local hardware store as much as possible. It’s better for small businesses, for the planet, and often also for your wallet! In this post you will find that I’ve linked several of the items I’m referencing. It’s a convenient way of sharing product recommendations with you, and it’s an option for those who may not have access to a good hardware store. As an Amazon Associate I earn from qualifying purchases when you shop with these links.
The Lineup
So far the coffee shop office has 4 different wall treatments. This week we’ll be tiling the closet to bring that up to 5! 🤦🏽♀️ What was I even thinking? Let’s recap the walls:
Wall 1
The rear wall is a simple, cool white wall, (Benjamin Moore’s Decorator’s White). The interest on this wall will come from the book display/hidden door to the utility closet, and some honeycomb shelves.
Wall 2
The left wall is a turquoise color called Dreamcatcher by Benjamin Moore.
Wall 3
The rear wall is a faux rough concrete wall made with colored joint compound and sealed with General Finishes Flat Out Flat topcoat. The original plan was to add gold leaf to this wall. But, I’ve had some trouble figuring out how to get the needed adhesion without leaving the wall sticky. So for now, I’m putting the gold leaf accent on hold until I see the desk and live edge shelves in place.
Wall 4
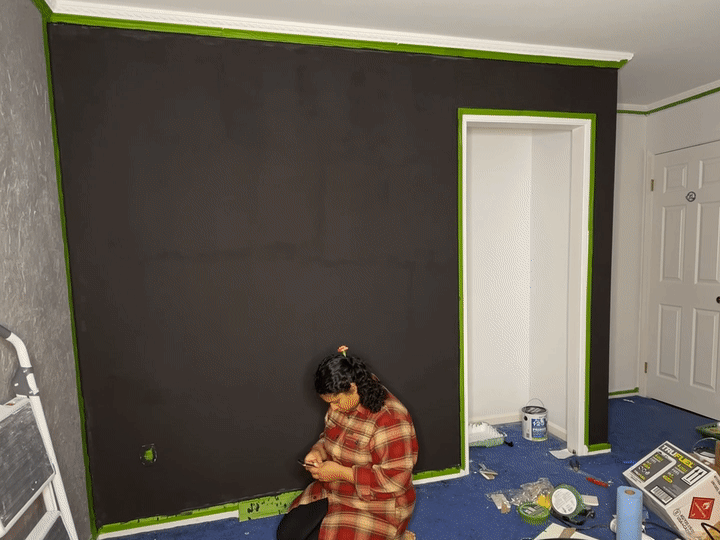
Lastly, we have a magnetic chalkboard wall in Anchor Grey by Benjamin Moore! (Before you ask, I am not sponsored by Benjamin Moore, I’m just becoming a fangirl as I try more of their paints.😊) Benjamin Moore makes a chalkboard paint that can be tinted to pretty much any color you want! And Rustoleum makes a magnetic primer that you can apply to make a wall magnetic. So I used both products to give the office a dark grey magnetic chalkboard wall.

6 Tips for A Great DIY Magnetic Chalkboard Wall
If you want to add your own magnetic chalkboard wall to a space, here some tips I picked up as we completed this project:
1. Use the right roller.
When making a chalkboard wall you want to apply the paint as smoothly as possible. So, instead of using a regular nap roller, try using a high density foam roller like this to apply both the primer and the chalkboard paint. Cleaning off the magnetic primer requires xylene, so save yourself the hassle and get a small one-time-use paint tray and roller head for this job and toss it afterwards. Especially if you have a septic system at home like we do. A kit like this has everything you need for $15. If you get roller heads with foam-covered ends, it even makes it easy to get the edges of the wall without needing a separate tool.
2. Work the paint in.
You don’t want thick coats of either primer or paint here, so once you get some paint on the walls, really work it in to make sure it’s been applied evenly. Use decent pressure and go from painted to unpainted wall with each stroke until there isn’t enough paint to spread around anymore.
3. Mask up.
I’m warning you, this magnetic primer is no joke. We opened the windows, an air filter going, and N-95 masks on, and it still gave me and my husband a lasting headache after each coat. We had to take a few hours between coats to recover, so be sure to give yourself enough time.
4. Mixing should take a while.
Don’t expect to be done stirring the magnetic primer in a minute or two. It’s going to take some elbow grease and at least 6 full minutes of stirring to turn the gloopy, oily mess into smooth application-ready primer. If you’re familiar with mixing up a jar of tahini, it’s a similar process. The magnetic primer separates in the can with the iron-containing solids on the bottom and the oily part on top. It CAN and WILL turn into a smooth, uniform, slightly matte liquid if you give it enough time. So, if you see lumps or a layer of oil, keep going. Make sure to re-mix before each coat because it settles quickly.
5. Dress in layers.
We did 3 layers of magnetic primer and two coats of chalkboard paint. This gave us a smooth, uniform wall with enough magnetism for a weak fridge magnet to hold a fews sheets of paper to the wall. The magnetic primer requires at least that 3 layers to have good magnetism after the chalkboard paint is on. To cut back on cost and hassle, consider only using magnetic primer on part of your chalkboard wall. We coated the whole wall instead. It was stinky and annoying, but having magnetism on the bottom half of the wall was vital for our one-year-old. Our son loves to play with foam magnets like these and these. It’s an easy way to keep him occupied and close when one of us has to hop on a call.
6. Wait for it.
The chalkboard wall needs a few days to cure and dry completely, and then you’ll need to prime the wall. To do this, rub it all over with the side of some soft chalk, and then wipe it down completely with a dry cloth. If you write on the wall before priming it this way, it will be near-impossible to erase what you write.
Subfloor Electrical
Now that the walls are all done and curing, it’s time to get to work on the new floors! We’re ripping up the carpet tomorrow and laying down some cables. Running the cables underneath the new flooring gives a clean look without sacrificing the boring yet critical office functionality. We’ll hide a computer tower in the utility closet and have ethernet at the desk without tripping over cables. I have family visiting this week, so we have no choice but to finish the flooring installation by Wednesday, or we’re down a much-needed guest room 😬.
The Main Event
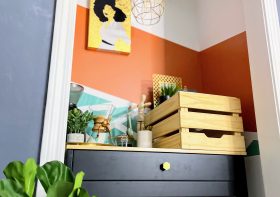
By the end of the week, it’ll finally be time to tackle the most anticipated part of this challenge — the tiled coffee bar! I’ve dreamed of the whole challenge 🥰! However, because time keeps on slipping (slipping, slipping…. into the future) I had to make some adjustments to the plans. Instead of building a custom cabinet and countertop for the coffee bar, I found a basic kitchen island to use. I’ll enhance it with new knobs and legs, add some LED lights, and install an outlet to power the appliances. I’m also using countertop shelving instead of wall-mounting shelves in the closet.
After weeks of brainstorming and pricing out approaches, we finally decided to skip the standing desk makeover. Instead, we’re shopping for two separate surfaces. A bar height table will serve as a standing laptop table, while a smaller industrial style desk will give us a primary working area and tie in more coffee shop vibes. I’m still looking for the perfect furniture, so I’m crossing my fingers that whatever I find can get here in time🤞🏽.
Can you believe the reveal is less than two weeks away and I still haven’t even ordered the furnishings for this space??? What am I doing??? Please check in with me on Instagram and give me a word of encouragement. I’m gonna need it if I’m going to get this done!
If you’re curious about other ORC participants, you can find all the guest participants here or check out the tags #oneroomchallenge and #BHGORC. See you on Instagram, and in next week’s post!


Leave a Reply