ORC Week 4: Living on A Prayer
Check out the other posts in this series!
Week One, Week Two, Week Three, Week Four, Weeks 5 & 6, Week 7, Week 8
In week 4 of the ORC, I face down a few problems with the walls, gear up for the floor install, and make my first lumber purchase as I get ready to build!
A note on product links: I highly encourage you to shop at your local hardware store as much as possible. It's better for small businesses, for the planet, and often also for your wallet! In this post you will find that I've linked several of the items I'm referencing. It's a convenient way of sharing product recommendations with you, and it's an option for those who may not have access to a good hardware store. As an Amazon Associate I earn from qualifying purchases when you shop with these links.
Faux Concrete Reveal
In my last post I teased you with a faux concrete wall made of joint compound that was still drying. Well, that wall took about 3 whole days to dry, but when it did, it was absolutely gorgeous!
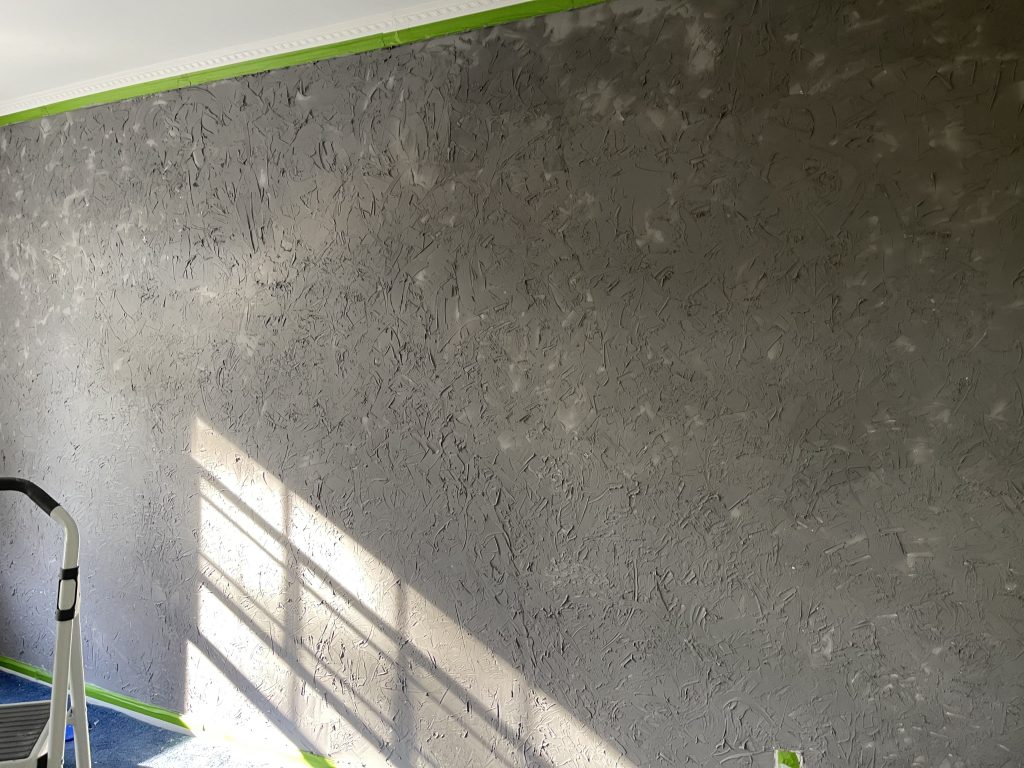
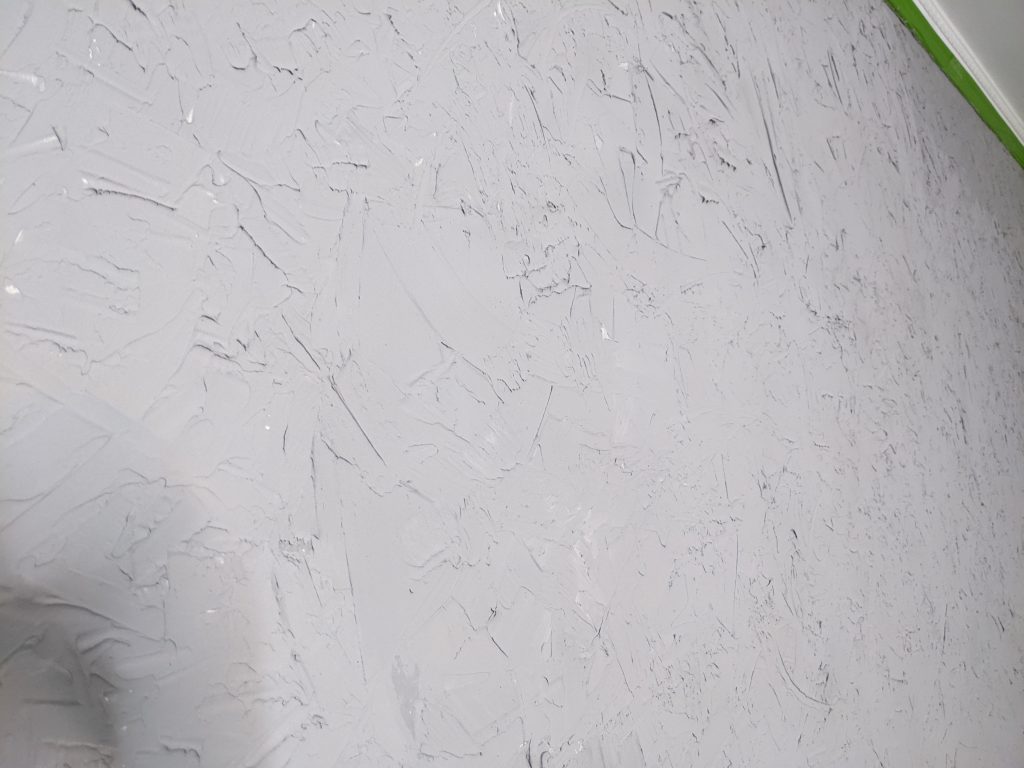
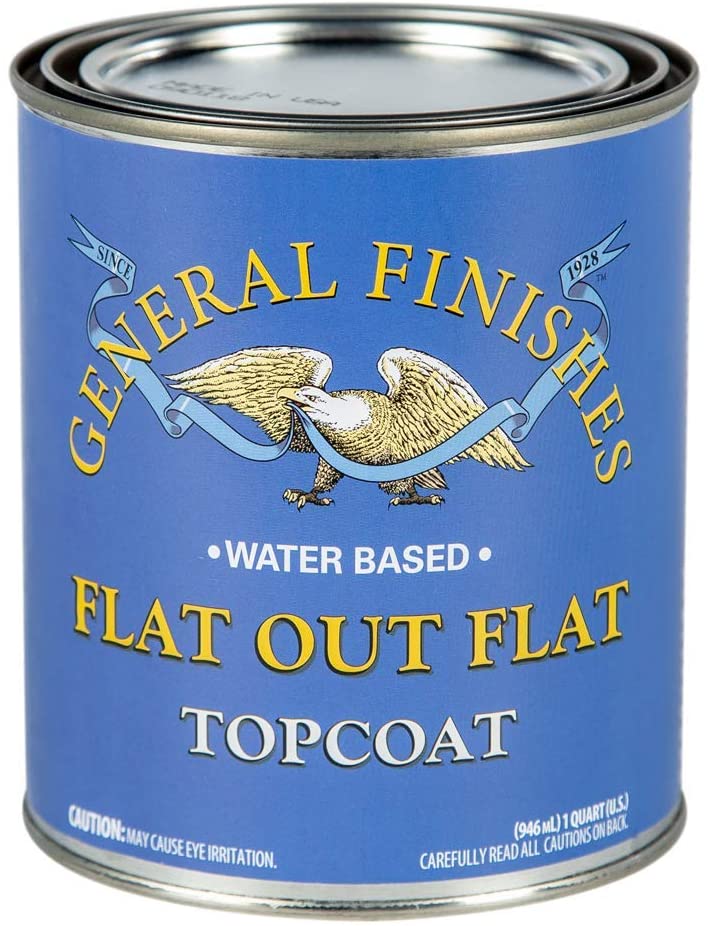
I’m in love with the color, and the subtle variation of shades from mixing joint compound up on the fly as I moved randomly around the wall, Not to mention the texture I got from using the putty knife! The only problem I ran into was how to protect my new baby feature wall. My first approach was to try polyurethane in a flat finish, but it added too much sheen and made the wall appear darker. I was just about to forego sealing it altogether when my husband, Albert, came through with a solution.
Albert trolled through the depths of Reddit and discovered an obsolete product which would have done the job. Luckily, he also found an ingredients list and found a similar product by General Finishes that would do the trick. Even better, it was available at my local hardware store, Ring’s End. (Have you seen my new Reel this week? I treat that place like my second garage.) I tested the Flat Out Flat TopCoat on the wall and was so amazed that I ran a second test. This product was perfect, just what I was looking for, sealing the wall without changing the color or texture. It’s a little on the pricey side, but this whole wall was done with about 25 dollars worth of materials, so I don’t mind. I’ll be applying the topcoat right after I finish the messy job of sanding down the rest of the walls!
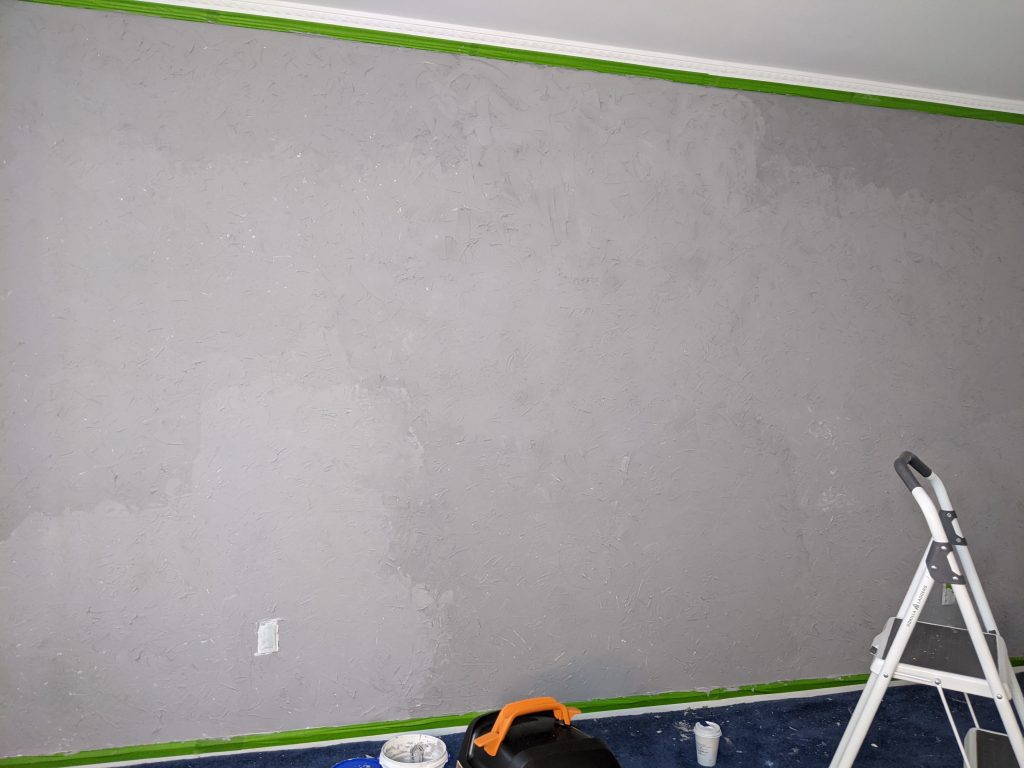
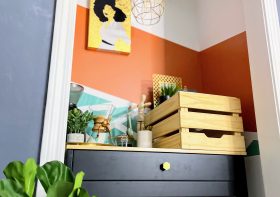
My walls are down… nearly
As for the other walls, this week and things are going smoothly! I got intimately acquainted with drywall patch kits for the smaller holes that needed repair. Then, I was able to do a couple of California patches to cover the highly damaged sections of wall. It was hard to say “good enough” when it came to sanding down the patchwork, but I found a trick that helped me stop before I over-sanded. I sanded at night, leaving the lights off except a spotlight aimed up the wall to illuminate the shadows of ridges that needed sanding. This helped me focus on just the areas that were too high.
Patching drywall was one of the most intimidating parts of this challenge. But now that I’ve done it, I don’t think it was too bad, and I highly encourage any DIYer, no matter how novice, to give it a shot. Knowing I can fix mistakes with the walls, I’m much more confident. I won’t balk as much at making changes that have a big impact like adding tile, hanging wallpaper, and mounting shelves.

Colorful Language
Beyond repairing the walls, I also was able to finally find the perfect shade of green/blue for the room. I used encycolorpedia to look for similar paint colors based on hex code I wanted. After testing a sample of Dreamcatcher by Benjamin Moore, I’m finally at ease over paint selection. This one is definitely the right color; and I won’t pretend I wasn’t a little biased by the name. I like the idea that my office is going to be a constant reminder to catch my dreams. (Even if prepping the walls is a bit of a nightmare.🥴)
The current plan is using this color on the left wall, while the right wall will become our magnetic chalkboard wall. I’ll be trying out the magnetic primer from Rustoleum this week. Look for an update in next week’s post. The rear wall is getting a fresh coat of white paint (Decorator’s White, for a nice cool shade to go with the grays and greens) and a very simple mountain mural, possibly using some of the rejected paint samples from my search for the right green.
The coffee bar design is still very up in the air. I’ll make the final calls on tiles and colors for that space next week, after the floors are installed and all the walls are complete. I’m looking forward to facing decisions on what to fill the room with instead of agonizing over wall and floor colors!
Flooring It
The flooring hasn’t arrived yet, but it’s due any day now! That’s why I’m racing to finish the walls before they do. We’ve been using the carpet as our own personal drop cloth while we work on the room. We just ignore spills and splatters of paint and joint compound because we know we’re tearing it all up soon. Hopefully the process of removing it goes smoothly and we’re able to get the flooring install completed this weekend! Then, we can show the fresh new space next week and start working on filling it with coffee shop details!
Lightening the Mood
Next week, I’ll be moving on from walls and floors and making some tough calls on floorplan, lighting, and furniture. I’ll also finally be using the power tools to transform the plywood we purchased into custom pieces for the office! So please be sure to follow me on Instagram and keep up with my stories for all of the late night DIY adventures I post.
If you’re curious about other ORC participants, you can find all the guest participants here or check out the tags #oneroomchallenge and #BHGORC. See you on Instagram, and in next week’s post!


Samantha
The walls look beyond stunning! Well done. Can’t wait to see the rest
semiglobalcottage
Thank you so much! I hope it lived up to your expectations!
Sanju
I honestly saw the first pic and was like – that’s faux concrete? It looks like the real thing! Awesome work and totally agree with shopping local.
semiglobalcottage
I’m so glad you like it! I was so nervous trying out a DIY with no tutorial.